Building Volume Clouds In
Bryce
Carl E Schou
April 30, 2002
| |
|
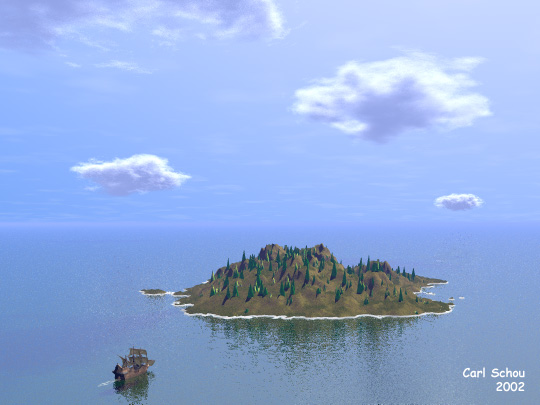
Landfall
Bryce is packed with options
for making clouds. The most commonly used are probably the
sky presets
that come with the program. Using the Bryce Sky Lab, you can
fine tune these presets or you can build a sky from scratch.
For most applications, this approach works great, but it does have
some drawbacks.
The clouds produced by this method are
always in the background and they are not real 3D objects.
Clouds can also be surface mapped onto an object, but the most
realistic results come from volume clouds and that's the topic of
this tutorial.
|
| |
|
What are
Volume Clouds?
Surface materials are only
applied to the surface of an object. For solid,
non-transparent objects, this is all you usually need. A
volume material is applied throughout the entire object. When
a cloud-like volume material is applied to an object like a sphere,
a volume cloud is produced.
|
| |
|
Pros and Cons
of Volume Clouds
If you need realistic,
well defined clouds, then volume clouds are the way to go.
Volume clouds can cast shadows, and are easy to modify in the Deep
Texture Editor (DTE). If you're doing an animated fly-through, the
realism of passing through a volume cloud can't be beat. The
price you pay for using volume clouds is render time.
|
| |
|
Size Matters
In the real world, clouds
are enormous in size, high above the ground, and seen at a great
distance from the viewer. The closer to life-size you build
the clouds in your Brycean landscape, the more life-like they will
appear. |
|
|
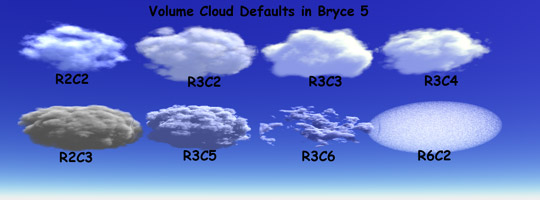
Some Default
Volume Clouds In the example below, a
sphere was created with a size of 2700.0 in X and Z, and 1000.0 in
Y. This was placed at a distance of about 10000.0 from the
viewer and replicated to produce 8 objects. The objects were
spread out and assigned different default volume materials.
For example, the first cloud (R2C2) was assigned the material in Row
2, Column 2 of the Edit > Materials palette (Wispy Cloud).
As you can see, the defaults offer a wide variety of starting points
for clouds. Not all of the defaults produce a realistic result
when used this way. The default in Row 6 Column 2 (Patchy Cloud Layers) is
one such case. This default works better when applied to an
infinite slab. |
|
|
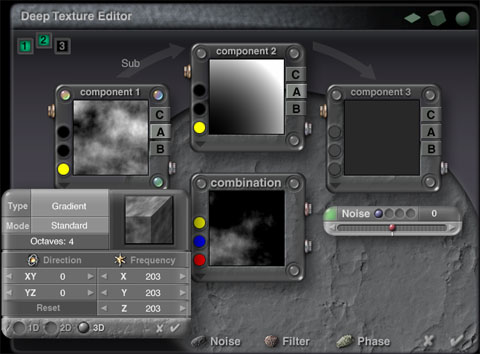
Cloud
Adjustments in the Deep Texture Editor
Now we'll see a few of the
ways that clouds can be changed in the DTE in
the Materials Lab. Start with a single cloud using the Wispy
Cloud default (R2C2) in the Volume materials. Enter the DTE
and open the pop-up for the first component's noise channel.
You should see something like the image below. |
|
|
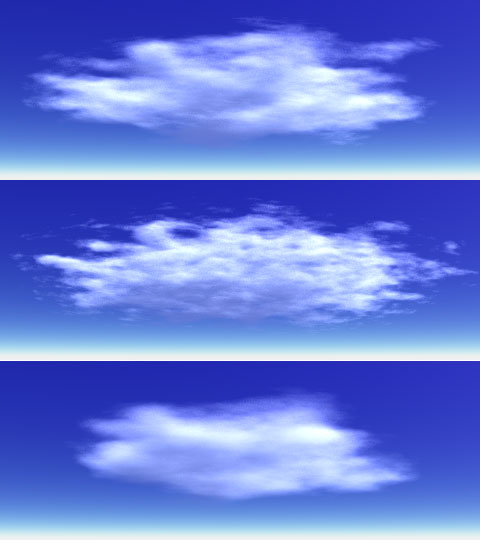
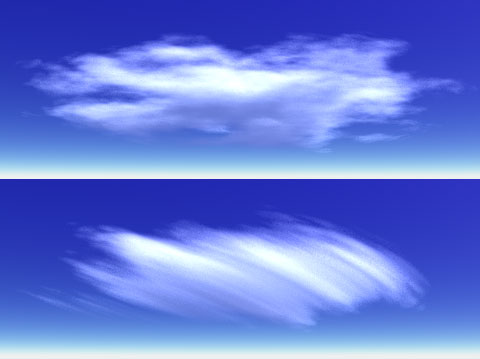
Effects of the
Octave Setting in the DTE
In the 3
pictures below, the top cloud is the default setting. For the
middle cloud, Octaves was changed from 4 to 3. For the bottom
cloud, Octave was set to 5. |
|
|
Rotating the
Noise in the DTE
In the next two images,
the Cloud was restored to default conditions (Octave=4) and the
noise was rotated. In the top picture, a 45 degree rotation
was applied to the XY plane. In the bottom picture, a 45
degree rotation was applied to the YZ plane. |
|
|
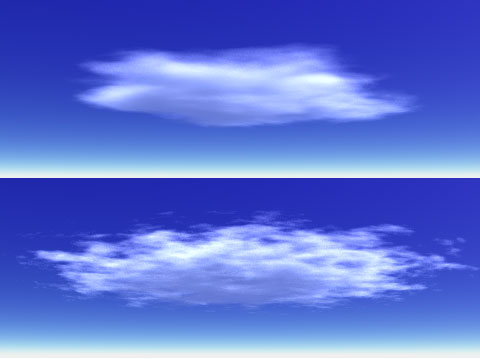
Changing Noise
Frequency in the DTE
In the next two images,
the cloud was restored to default conditions (rotations=0) and the
frequency of the noise was varied from its default value of 203 for
X,Y, and Z. In the top picture, the frequency was changed to
101 for X,Y, and Z. In the bottom picture, frequency for X,Y,
and Z is 406. |
| |
|
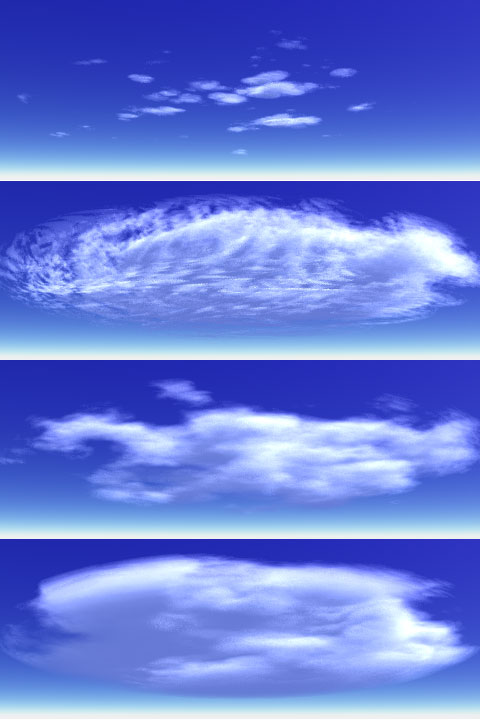
Other Noise
Types
Changing the type of noise
used can have a big impact on the character of the cloud you
produce. The Wispy Cloud default used Gradient Noise.
The four images below were produced using Leopard Noise, Random Saw Noise, Value Noise, and Stucco Noise (top to bottom). |
| |
|
Voronoi Noise
The four images below were
produced using the following types of noise: Voronoi Distance 1,
Voronoi Distance 2, Voronoi Distance Sq2, and Voronoi Distance Sq3. |
| |
|
The Rest of the
Picture
The picture at the top of
this tutorial, "Landfall" was produced
using four volume clouds. These clouds are all at about the
same height and at different distances from the viewer. The
Sky Lab was tweaked to produce a slight haze with a few barely
visible stratus clouds. The
island was built from three identical terrains in the same position
- the first for the actual island, the second had noise added with a
vegetation material and it was lowered a bit to produce the trees,
and the third was made white and its height was decreased a little
to produce the island's waterline. The ship model was
downloaded from 3dmodelz.com. The wake behind the ship was
produced by adding a clipped terrain with a cloud texture applied. |
[RETURN TO TUTORIALS]
Copyright © 2002,
Carl E Schou, All Rights Reserved |