| Carrara Studio 3
Tutorial: Make a Weeping
Willow Tree
Carl E. Schou
November 30, 2003
| |
|
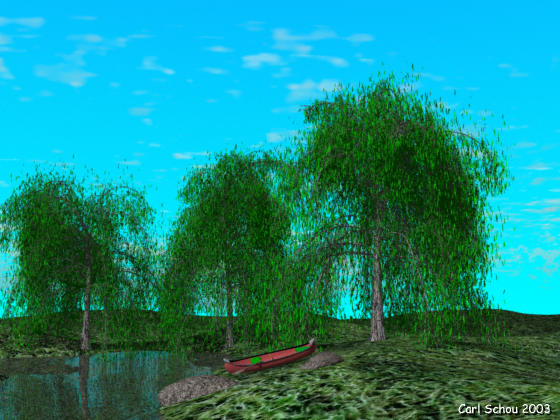
The Red Canoe
Carrara Studio 3 has a new Plant Modeler which provides 28
default tree and plant shapes which may be used to add
vegetation to a landscape. The default trees may be used as
is, or they may be modified to produce a
custom tree, or the tree can be produced completely from scratch.
The trees are also exportable in a number of different file formats
so they can also be used by other 3D programs if you wish. For this month's tutorial, we are going to modify
Carrara's default Willow tree to produce the Weeping Willow trees
shown in the image above. A few of the images used in this
tutorial are fairly large, specifically the two images of the
Advanced Parameters window and the image of the Shader window. To speed up download times, smaller
versions of these images are provided in the main body of the
tutorial. Clicking on one of these smaller images will open the
full sized version in another window.
If this larger image doesn't appear at
full size, then let your mouse hover over the image and click on the
magnification button that appears. |
| |
|
Strategy for Modifying a Tree
(1) Pick a tree similar in shape or type to the one you want to
produce.
(2) In the Plant Modeler, modify the tree's parameters.
(3) Modify the leaves or create new leaves if needed.
(4) Apply textures that fit your tree type. |
| |
|
Start with the Default Willow Tree
To begin, start up Carrara, then go into the Assembly Room and drag the
Plant icon into the workspace to enter the Plant Modeler. The
Plant icon is the ninth item in the top toolbar as shown below. |
| |
|
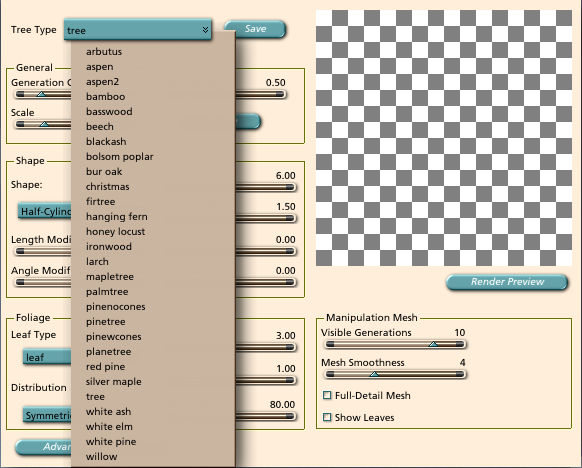
Once you are inside the Plant Modeler, click on Tree Type to open the drop-down menu and select Willow
from the bottom of the list as shown below. |
| |
|
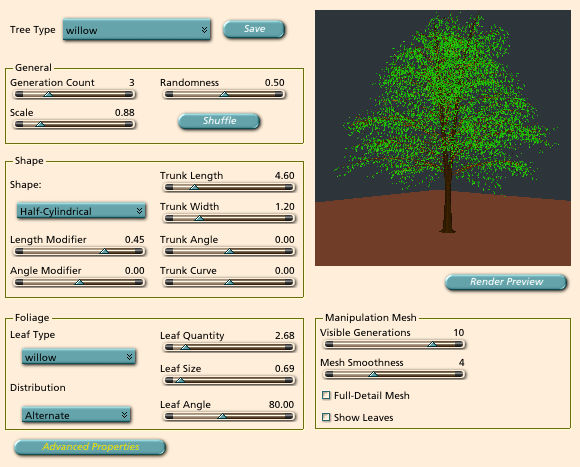
The default Willow tree should appear in
the Plant Modeler's preview window as shown. |
| |
|
Modify the Advanced Parameters
We're starting our modifications with the Advanced Parameters
because that is where you will find the control for the most
characteristic aspect of the Weeping Willow tree, its droop.
From
the Plant Modeler's main window, click on the Advanced Parameters
button and a window should open as shown below. Click the image
to see the full sized version of this screen. |
| |
|
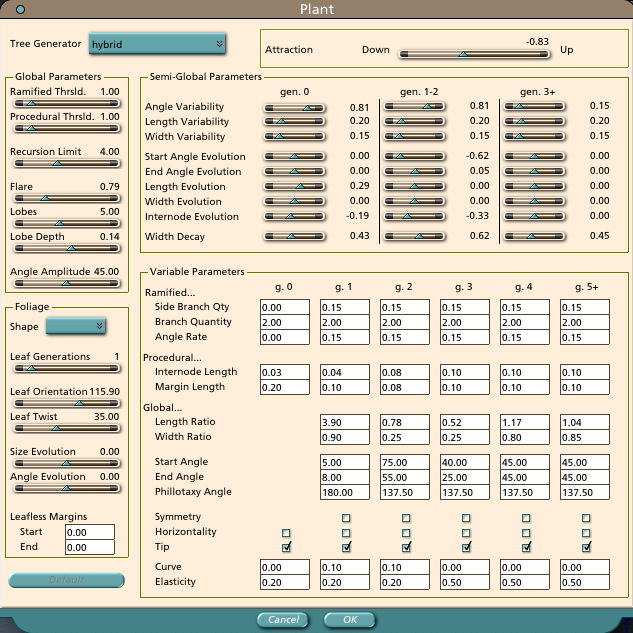
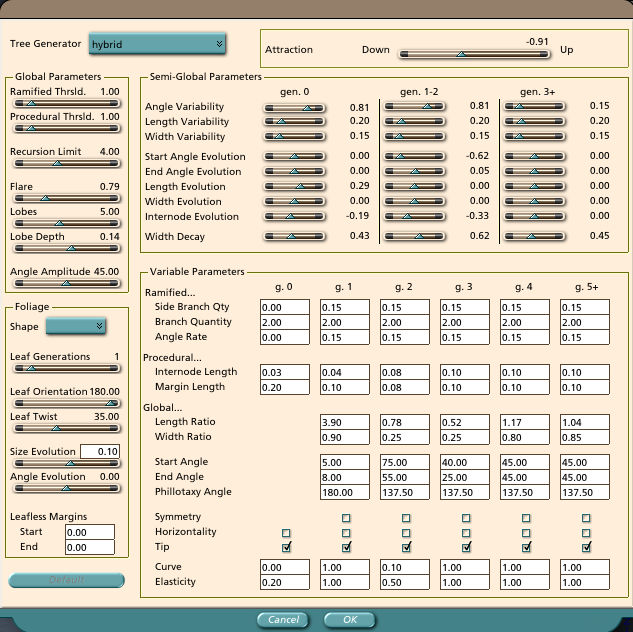
Next, change the settings in the
Advanced Parameters window to match those shown below. In the
Foliage section, set Leaf Orientation to 180 degrees to make the
leaves hang straight down. In the Variable Parameters section, set
the Curve and Elasticity values as shown to increase the amount of
droop. Also set
Attraction to -0.91. Click the image to
see the full sized version of this screen. |
| |
|
Making a New Leaf
The leaves of the Weeping Willow are longer than those of the
Willow tree. For our tree, we will modify the original Willow
leaf and save the changed leaf model under a new name. The new
leaf model will then replace the original leaves in the Weeping
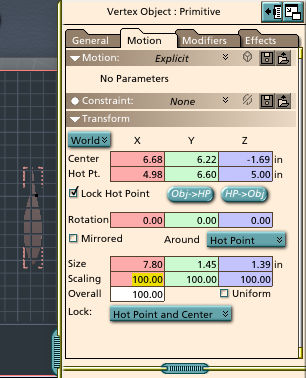
Willow tree. Return to the Assembly Room and press CTRL+O to open
a new file. In the browser that opens up, go to the folder
where you installed Carrara and go into the Plants folder inside the
Data folder. Select the file "willow.car" and press Enter to
open it. You should see something like the image below. |
| |
|
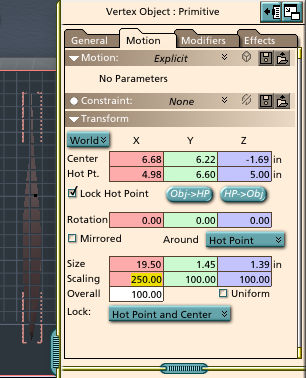
Change the scaling in the X direction from 100% to
250% as shown below to stretch the leaf, then save the file as
"willow_250.car" in the same folder as the original leaf
file.
|
| |
|
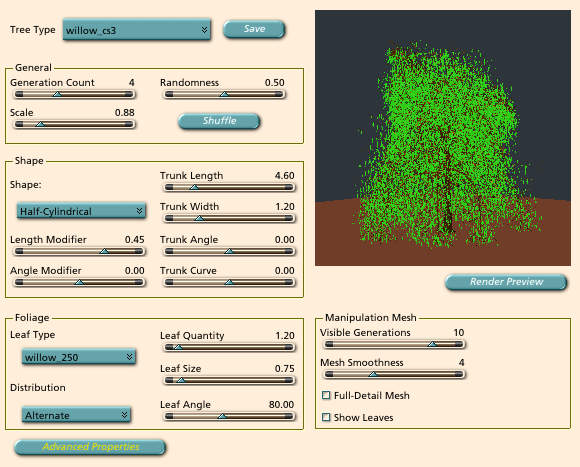
Next, return to the main Plant Modeler
window to add the new leaf to the tree and make the final
adjustments by entering the values shown in the screen below.
In the Foliage section, change Leaf Type to willow_250, change Leaf
Quantity to 1.20, and change Leaf Size to 0.75. In the General
section, change Generation Count to 4. This was saved for last
because adding generations to a tree can greatly increase the number
of computations required. If your machine has a slow
processor, you can still get very acceptable results just using 3
generations. When you are satisfied with the appearance of the
tree, click the Save button next the Tree Type drop down menu, and
save out your tree under a new name to add it to the default tree
Library. |
| |
|
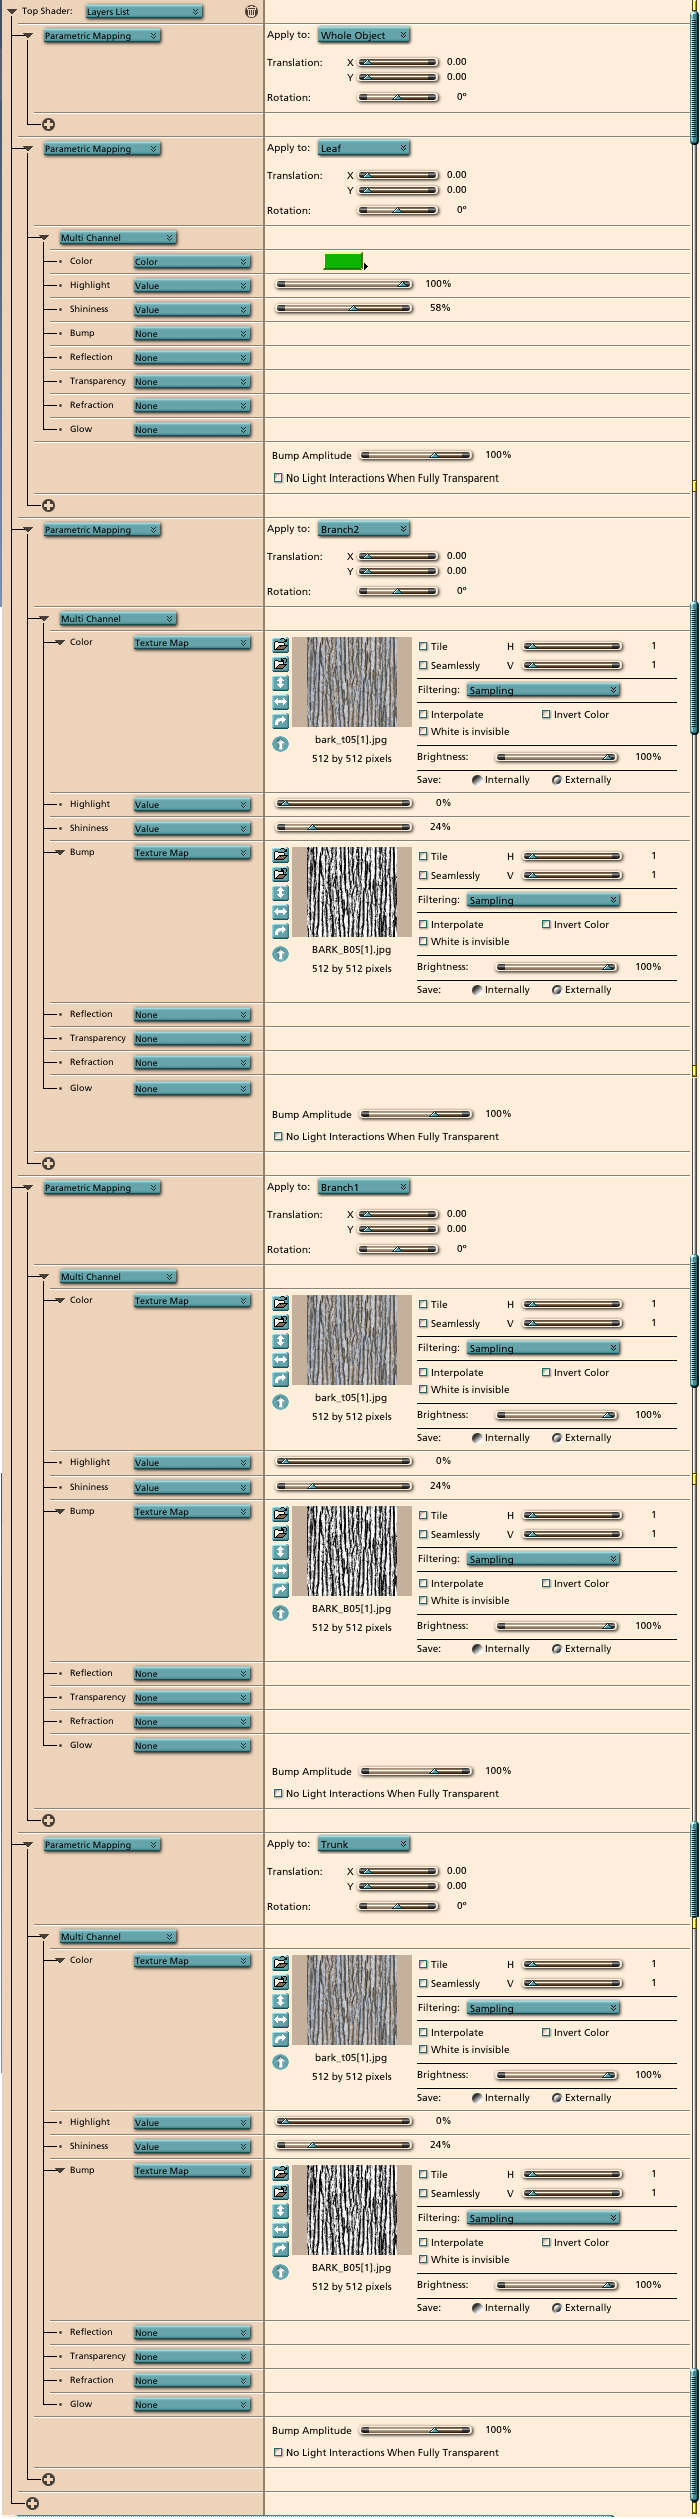
Applying the Shaders
The default shader for the trees made in the Plant Modeler may be
modified in the Texture Room. Each tree model has four
different parts which may be textured independently. These are
the Trunk, Branch1, Branch2, and the Leaf. The first section
of the texture I used for the Weeping Willow tree is shown in the
screenshot below. The boxes for Tile and Seamlessly were left
unchecked in this particular shader, though for most cases you would
want to use these features. Click on the image to see the complete
shader in a separate window, and be sure to use the magnification
button to get the full sized image. This image is large so you will
need to use your scroll bar to see it in it's entirety. |
| |
|
The images of tree bark used for the
color and bump maps of the Trunk and Branches were free downloads from The3dStudio. There are also Tree shaders for
Carrara available commercially from Shaders3d. The Internet
addresses are listed in the Related Links section of this tutorial. |
| |
|
The Rest of the Picture
Three copies of the Weeping Willow tree model were used in The
Red Canoe image. The Shuffle button in the Plant Modeler was
pressed to change the random seeds used to generate each tree so
they did not come out looking like virtual clones. The canoe
was built in Carrara's Vertex and Spline modelers. The
landscape was a terrain textured with an image map, and water and
boulders were added in. The sky was made up of a Bi-Gradient
backdrop with one large sparse volume cloud.
Well that's all there is to it, I hope you
enjoy your Weeping Willow tree. Give it enough disk
space to grow in and plenty of water, and it should last for years to come. |
[RETURN TO TUTORIALS]
Copyright © 2003,
Carl E Schou, All Rights Reserved |