| Carrara
Tutorial: Undersea Effects
with Light Cones and Gels in Carrara
Carl E. Schou
January 31, 2004
| |
|
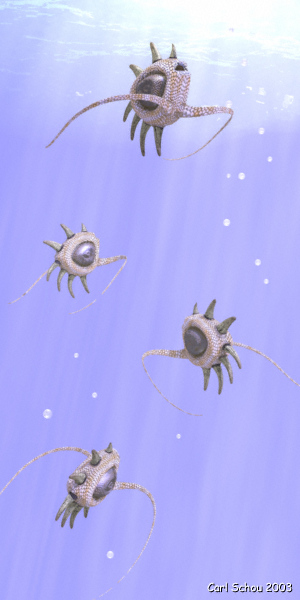
MorningStar Ascension
There are many different ways to get underwater effects in
computer graphics. For this month's foray into the digital
domain, we will look at how this can be done using gels and
light cones in Carrara.
The image above and the one at the end of this tutorial were done in Carrara Studio
3, though the ability to use gels and light cones was available in
earlier versions of Carrara. The gels were created using PhotoShop and
the Caustics Generator program.
An alternative method to produce underwater lighting would be to
apply a transparent water texture with waves in the bump channel to
a plane or a terrain placed in between the light source and the
scene and to render with caustics turned on. However, if you
want to have visible beams of light in your image, it's hard to beat
the results you can get using a light cone with a gel and 3D Shadows
activated. The two full sized Carrara screenshots and the
screenshot from the Caustic Generator program used in this tutorial are fairly large.
To speed up download times, smaller versions of these
images are provided in the main body of the tutorial. Clicking
on one of these smaller images will open the full sized version in
another window. If this larger image doesn't appear at full
size, then let your mouse hover over the image and click on the
magnification button that appears.
We will begin with some background
about caustics and gels, then outline the approach used for this
project before we dive into creating underwater scenery. The
main focus will be on the lighting effects for the image at the top
of tutorial, MorningStar Ascension. |
| |
|
Background on Caustics and Gels
Caustics refers to the manner in which light reacts when it
passes through a refractive medium like water or glass. The
Index of Refraction is a measure of how much the path of a light
beam bends when it passes from one medium (such as air) to another
(such as water). When the refracting surface is not completely
flat, the light passing through it will focus and defocus to form
alternating bright and dim areas. This effect is familiar to
anyone who has ever looked at the light patterns on the bottom of a
swimming pool on a sunny day. A gel is an image applied to a light, turning the light into a
sort of slide projector for that image. In the early days of
electric lighting, gelatin filters were used to color stage
lighting. As brighter (and hotter) lights came into use, the
materials used to make the filters changed, but the original name
stuck and got carried over into the terminology of computer graphics
lighting. |
| |
|
Strategy for Light\Water
Interaction
(1) Open a pre-existing scene, or create a new scene
where you want to apply the lighting effects.
(2) To
get the effect of limited visibility produced by the murkiness of
the water, add distance fog to the scene.
(3) To
get the effect of light passing through water and illuminating the
bottom, make a gel with a
caustic light pattern and apply it to a spot light with the Light
Cone enabled. This will be called the Caustics Spotlight.
(4) To get the effect of the sun's disk
seen through the surface of the water, make a gel of the distorted
disk and apply it to a spot light positioned over the transparent
surface of the water. This will be called the SunDisk
Spotlight. |
| |
|
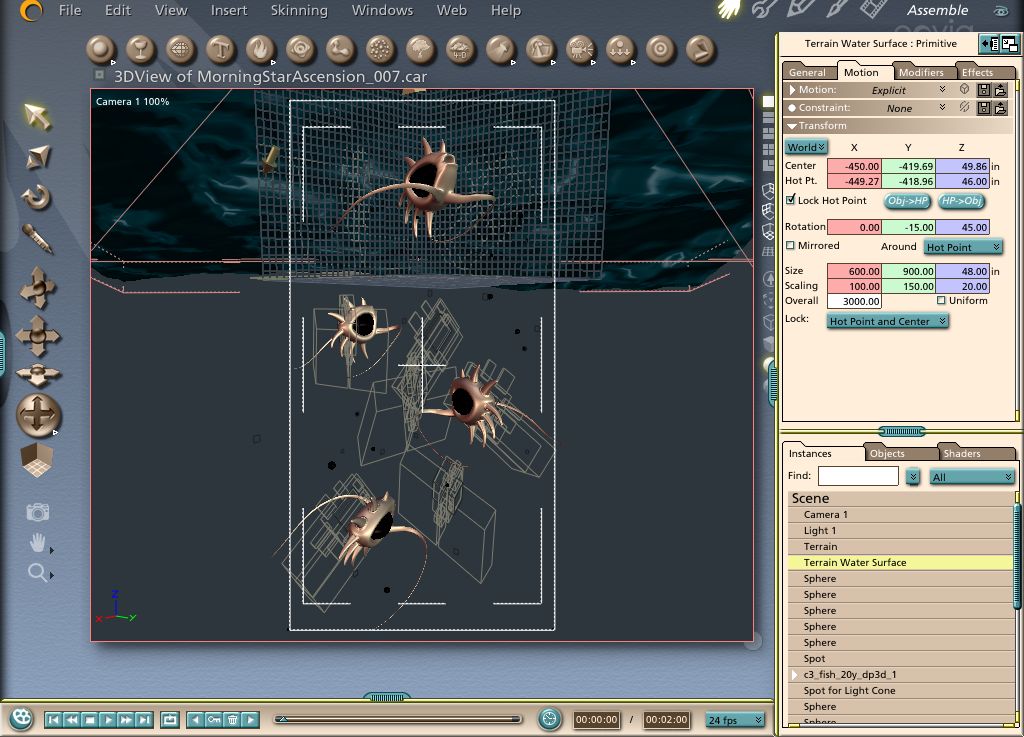
Setting the Scene
This scene was based on some rather surrealistic fish models I
had built in Carrara for an earlier project. I wanted to show
the fish swimming up toward the sunlight at the surface and to
capture the effects of the light passing down through the water.
The view from the rendering camera is shown in the Assembly Room
screenshot below. Click on the image for a full sized 1024 by
737 pixel version. |
| |
|
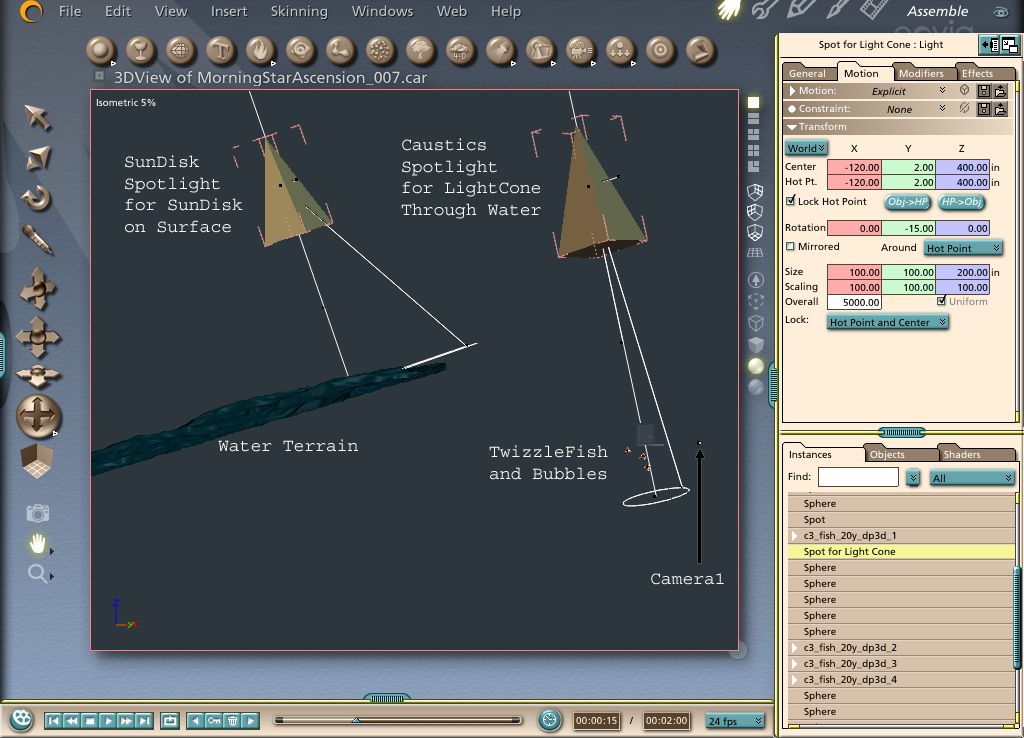
In the screenshot below, we have
switched to an isometric side view and pulled back a great distance
to show the relative positions and sizes of the different parts of
the scene. To give a sense of scale, the height from the
lowest fish to the highest fish is about 50 inches in Carrara units.
The Caustics Spotlight is about 400 inches over the fish, with a
narrow half angle to force the light beams to be nearly parallel
rather that fanning out in a cone shape. The terrain used for
the water's surface is about 400 inches behind the fish, and the
SunDisk Spotlight projects the sun's image onto the water's surface
from a height of about 300 inches. Click on the image for a full sized 1024 by 738
pixel version. |
| |
|
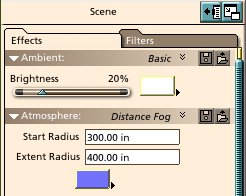
Haze up the Water with Distance Fog
To keep our water from appearing too clear, we are
going to add in Distance Fog. Select the Scene and adjust the
settings for Distance Fog as shown below. The Start Radius is
the distance from the camera that the fog begins, and the Extent
Radius is the distance at which the fog becomes completely opaque. Remember that the
values shown are what were needed for the scene I set up and that
any other scene will probably need different settings. The
values were chosen to keep the water clear in the foreground,
slightly hazy at the surface overhead, and completely hazy at the
surface in the rear. This causes the farther portions of the
surface to fade out into the blue background haze of the water. |
| |
|
The Light Through the Water -
Making the Caustics Gel To produce the beams of light passing
through the water, we are going to build a Caustics Spotlight by
attaching gel of a caustics pattern to a spotlight and project it
down into the scene with the light cone effect turned on.
To
create the gel of the caustic pattern, we are going to use a
free program called Caustics Generator which can be downloaded
through the web address supplied in the Related Links section at the
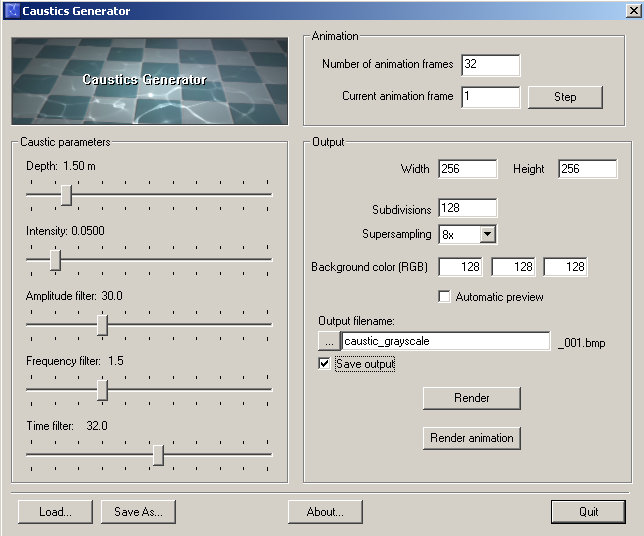
end of this tutorial. The control panel from the Caustics
Generator is shown in the image below. Click on the image to see a larger 644 by 536 pixel version. |
| |
|
The Caustics Generator program was run
with the settings show above. The caustic render was saved as
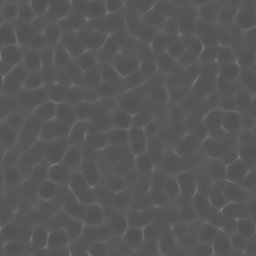
a BMP file. The contrast of the image was decreased a bit in
Photoshop since a subtle caustic effect was all that was wanted for
this project. The finished image that was used as a gel is
shown below. |
| |
|
The Light Through the Water -
Making the Caustics Spotlight
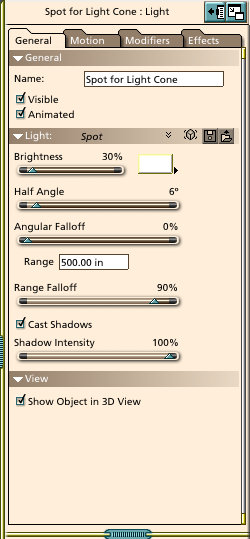
If you have not already added a spotlight to your scene for
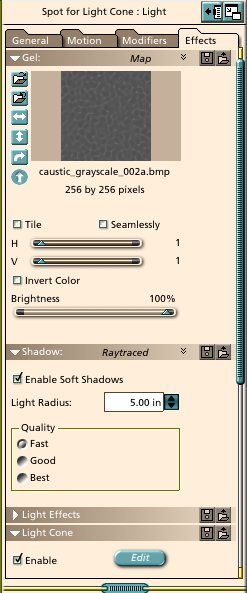
projecting a caustics gel, do so now. Select the spotlight and adjust the parameters as shown
below for the General and Effects tabs of the Properties tray at the
right side of your screen. Note that you will be adding the
Caustics gel image to the spotlight using the browser under the
Effects tab. |
| |
|
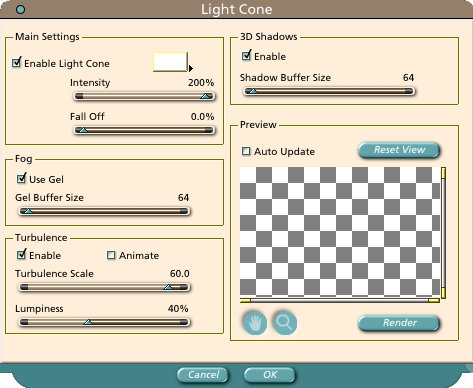
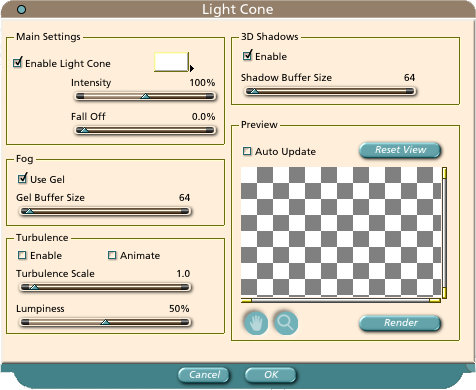
In the Light Cone section under the
Effects tab, click the Edit button, then adjust the settings in the
pop-up window to match the screenshot below. Note that you may
need to increase the Shadow Buffer Size or the Gel Buffer Size, to
prevent the appearance of any artifacts in the light cone.
Increasing these parameters will increase render times, so it's
recommended to do a few quick test renders to see if you can get by
with the minimum Buffer sizes of 64. In addition, it is
recommended that you leave the Animate Turbulence box unchecked as
shown, unless you are making an animation, since that will also
increase render times. |
| |
|
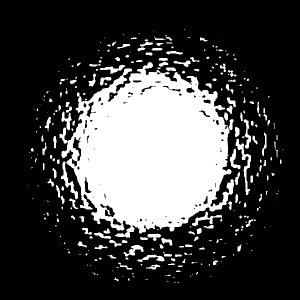
The Light on the Water - Making the
SunDisk Gel
To make the light visible on the surface of the water, we are
going to use PhotoShop to make an image that will be used as a gel.
Create a new image in Photoshop with same length sides. I used
600 by 600 pixels, but the exact size doesn't matter as long as it
is large enough to have sufficient resolution. Create a
circular selection in the center of this image by activating the Elliptical marquee
tool and dragging out from the center of the image while holding down
the Shift and Alt keys. Invert the selection to select the
area outside of the circle and use the paint bucket tool to fill
that area with black. Apply the Ocean Ripple filter from the
Distort section and adjust the Ripple Size and Magnitude to get
something like the image below. |
| |
|
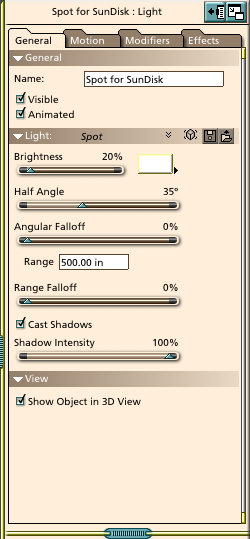
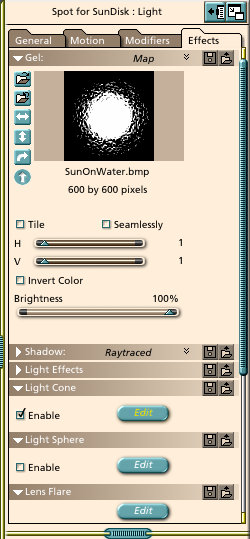
The Light on the Water - Making the SunDisk
Spotlight
If you haven't created the SunDisk Spotlight yet, do so now.
Repeat the process you went through for the other spotlight by
applying the SunDisk gel to the light and adjusting the parameters
under the General and Effects tabs to match the values shown in the
screenshots below. |
| |
|
In the Light Cone section under the
Effects tab, click the Edit button, then adjust the settings in the
pop-up window to match the screenshot below. Note that the
main differences between the light cones for the two different
spotlights are in the Intensity and the Turbulence settings. |
| |
|
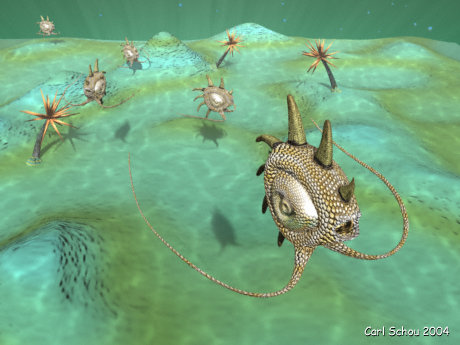
The Light on the Bottom
The same caustic spotlight and gel used to produce the effect of
light passing through the water may also be used to create caustic
light patterns on the bottom, as shown in the image below, The Reef
of the MorningStars. |
| |
|
Other Options - Procedural Gels
Another option, which has just become available from Digital
Carvers Guild, is a plug-in called ShaderGel that uses procedural
shaders as the gel on the spotlight and light cone. The
advantage to this approach is that the caustic spotlight can be
constructed entirely inside of Carrara. |
| |
|
The Rest of the Picture(s)
The model of the TwizzleFish was built in Carrara 3 for an
earlier project. The UV mapping was done in UnWrap3D and
textures were applied in PhotoShop with some touchup in Deep Paint
3D. The image at the top of the tutorial, MorningStar
Ascension, was rendered in Carrara using Global
Illumination in Skylight mode with Caustics enabled. The
plants in the image at the bottom of the tutorial, The Reef of the
MorningStars, were produced by the new Plant Modeler and the image
was rendered in Carrara. |
[RETURN TO TUTORIALS]
Copyright © 2004,
Carl E Schou, All Rights Reserved |